Topics

Feb 5, 2011

Open files and folders by a single click in Windows 7

By default, you have to double-click to open a file or folder. You can change this behavior and have Windows 7 open a file or folder by a single click. Perform the following steps to do so:
1. Click the Start button and then click Control Panel.
2. If the View by: is Category then click on Appearance and Personalization and then click Folder Options. If the View by: is Large icons or Small icons then click on Folder Options.
3. In the Folder Options dialog box, under General tab, click Single-click to open an item (point to select).
4. Click Apply and then click OK.

Show hidden files and folders in Windows 7

By default, Windows 7 does not show the hidden files, folders or drives. To view the hidden files, folders, or drives, perform the following steps:
1. Click the Start button and then click Control Panel.
2. If the View by: is Category then click on Appearance and Personalization and then click Folder Options. If the View by: is Large icons or Small icons then click on Folder Options.
3. In the Folder Options dialog box, click the View tab and click Show hidden files, folders, and drives.
4. Click Apply and then click OK.

Show menu bar when opening folders in Windows 7

Windows 7 displays folders in windows. The same applies when opening libraries, Computer, Windows Explorer. If you had used Windows XP or a previous version of Windows, you may see the menu bar by default. In Windows 7, by default the menu bar is hidden. You may make the menu bar appear permanently by performing the following steps:
1. Click the Start button and then click Control Panel.
2. If the View by: is Category then click on Appearance and Personalization and then click Folder Options. If the View by: is Large icons or Small icons then click on Folder Options.
3. In the Folder Options dialog box, click the View tab and click to place a checkmark beside Always Show Menus.
4. Click Apply and then click OK.

Picture with menu bar

Do not show thumbnail previews for files in Windows 7

If the thumbnail preview feature is enabled then your computer will slow down. To view thumbnails, you must change the view to Extra Large Icons, Large Icons, or Medium Icons. To do so, open Windows Explorer or click Start button and then click Computer button. Press Alt key to make the Menu Bar appear. Now click on the View tab and do the selection.
Follow these steps to disable the thumbnail previews:
1. Click the Start button and then click Control Panel.
2. If the View by: is Category then click on Appearance and Personalization and then click Folder Options. If the View by: is Large icons or Small icons then click on Folder Options.
3. Click View tab, under Advanced settings:, click to place a checkmark beside Always show icons, never thumbnails.
4. Click Apply and then click OK.

Below is the image for viewing thumbnails for files:
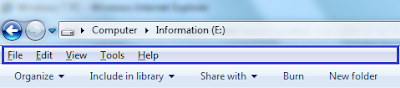
The following image does not show thumbnails for files:

Preview files from Windows Explorer in Windows 7

One of the most useful and much improved feature in Windows 7 is the Preview pane in Windows Explorer. The Preview pane helps you to preview images, videos (all files types that Windows Media Player supports), webpage files, text files (created in Notepad, WordPad), PDF files (when Adobe Acrobat Reader is installed), Microsoft Office files (when Microsoft Office is installed) without opening the respective applications. You may view the Preview Pane by pressing Alt and P keys from the keyboard.

You may also view the Preview pane by:
Clicking Show the Preview pane button from the top right part of the window.
Or
Clicking Organize button, hovering the mouse over Layout and then clicking Preview pane.

Note:
You may not be able to edit the changes to text file's from the Preview pane. However, you can copy the text from the text files from the Preview pane.
You may resize the Preview pane.
You may show/hide the Preview pane.

Arrange windows side by side on the desktop using Snap in Windows 7

Need to compare two documents, transfer files or folders from one window to another easily then use the Snap feature to easily do this. Perform the following to arrange windows side by side on the desktop using Snap.

To arrange a window to the left part of the screen, click and drag the title bar of the window until the mouse cursor is at the left most part of the screen. When you see the graphic displaying the outline of the expanded window, release the mouse button.
Repeat the same for the second window but this time click and drag the title bar of the second window to the right portion of the screen.

You may also perform the same using your keyboard. The keys for arranging windows side by side are:
Windows Logo key + Left arrow to arrange the window to the left part of the screen.
Windows Logo key + Right arrow to arrange the window to the right part of the screen.

Enable or disable pop up description in Windows 7

In Windows 7, when you point your mouse over the items on the startup or on a file or folder, you will see a small pop-up that provides information regarding the properties of that item or the functionality of that item. You may choose to enable or disable pop-up descriptions based on your customization needs. Perform the following steps to do so:
1. Click the Start button and then click Control Panel.
2. If the View by: is Category then click on Appearance and Personalization and then click Folder Options. If the View by: is Large icons or Small icons then click on Folder Options.
3. In the Folder Options dialog box, click the View tab and do one of the following:
  • Enable pop-up description for folder and desktop items - Click to place checkmark beside Show pop-up description for folder and desktop items.
  • Disable pop-up description for folder and desktop items - Click to remove checkmark beside Show pop-up description for folder and desktop items.
4. Click Apply and then click OK.

Compressed (Zipped) Folders Error - cannot be compressed because it includes characters ...

When you try to zip a folder by right-clicking the folder, hovering the mouse over Send to and clicking Compressed (zipped) folder, you may receive the following error " cannot be compressed because it includes characters that cannot be used in a compressed folder, such as ©. You should rename this file or directory", where is the name of the folder that you are trying to compress. The will have a full path. For example, "F:\Users\Public\Documents\New Folder\Copyright © cannot be compressed because it includes characters that cannot be used in a compressed folder, such as ©. You should rename this file or directory."
The reason for this error message to appear is the © character present either in the parent folder or within the files or folders inside the parent folder. Removing the © character from the file or folder name resolves the issue. Once it is done, you will be able to compress the folder.
From the picture in the right, there is a file named File Copyright © and a folder named Copyright © which are present inside the New folder. When you compress New folder, you may receive the error message 'F:\Users\Public\Documents\New Folder\Copyright ©' cannot be compressed because it includes characters that cannot be used in a compressed folder, such as ©. You should rename this file or directory. In this case, you have to rename both the file and folder.

Select items that are not next to each other in Windows 7

You may perform the following to select the items (files, folders) that are not next to each other:
1. Click to select the first item.
2. From the keyboard, press the Ctrl key.
3. Keeping the Ctrl key in pressed state, click to select other items.